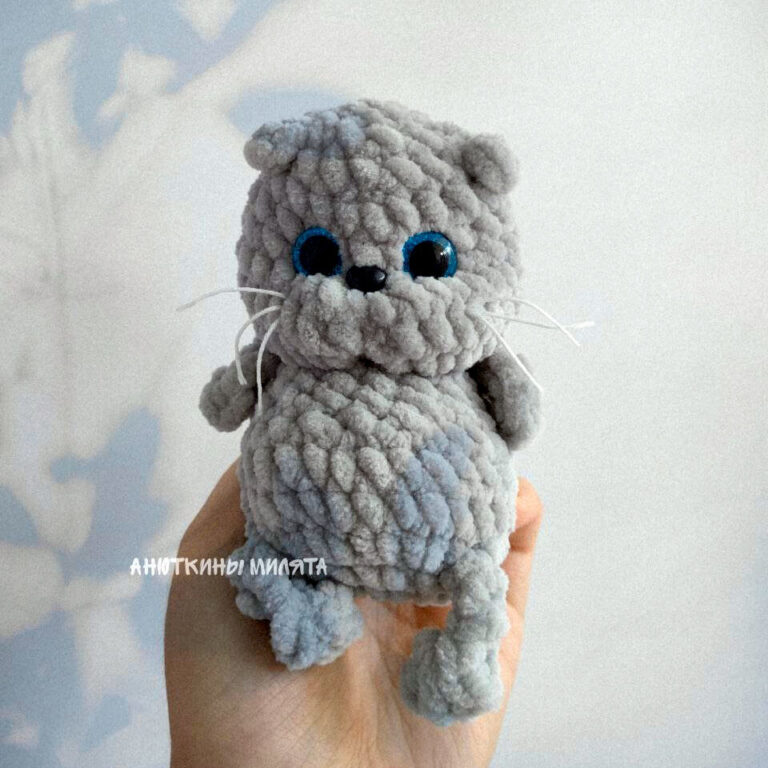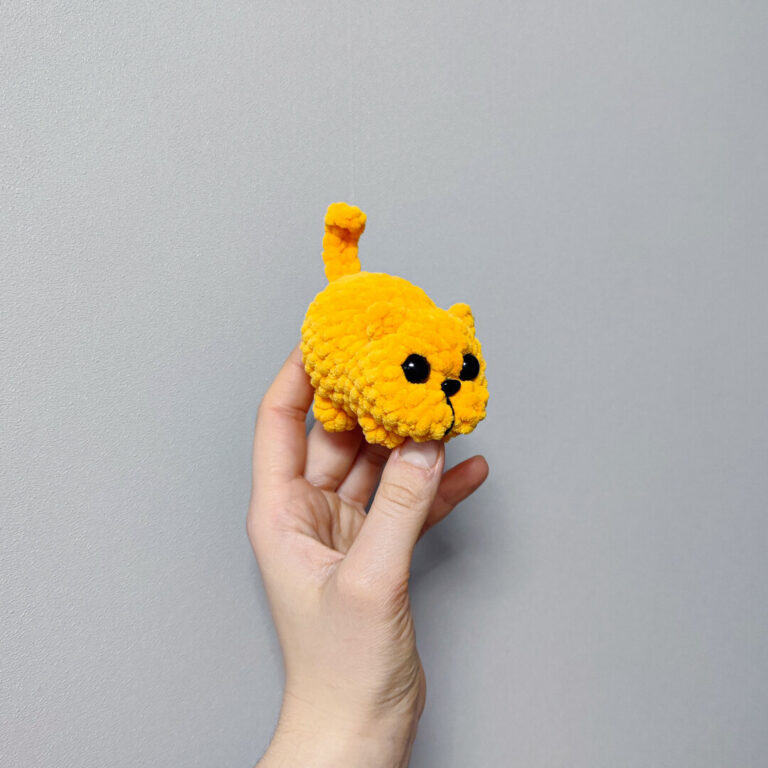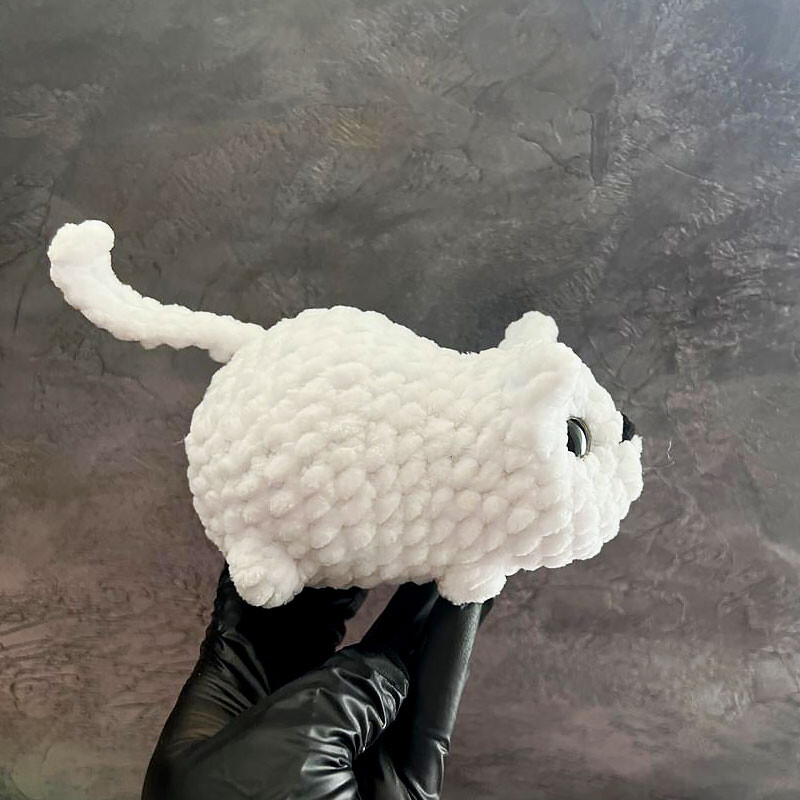
How to Crochet a Chubby, Squishy Cat: Easy Step-by-Step Plush Pattern
“`html
Easy Crochet Plush Cat: Free Step-by-Step Amigurumi Pattern
Looking for a quick, adorable crochet project? This chubby plush cat is perfect for beginners and experienced crafters alike. Using bulky plush yarn, you can create a soft, squishy friend in just one sitting. This pattern features an “all-in-one” body style where the legs and tail are worked directly into the piece, minimizing sewing!
Materials You Will Need
- Yarn: Super Bulky Plush/Chenille Yarn (e.g., Bernat Blanket or Himalaya Dolphin Baby)
- Hook: 4.0 mm (G) crochet hook
- Eyes: 10mm or 12mm safety eyes
- Filling: Fiberfill stuffing
- Tools: Yarn needle, scissors, and embroidery thread for the nose and whiskers
Crochet Abbreviations (US Terms)
- MR: Magic Ring
- Sc: Single crochet
- Inc: Increase (2 sc in one stitch)
- Dec: Decrease (sc 2 together)
- Ch: Chain
- Sl st: Slip stitch
- Hdc: Half double crochet
- Dc: Double crochet
- Tr: Treble crochet
- Bobble: 4 or 6-dc cluster stitch (used for legs)
Main Body & Head Pattern
Note: The piece is worked from the nose toward the tail.
Round 1: 6 sc in MR (6)
Round 2: 6 inc (12)
Round 3: (1 sc, inc) x 6 (18)
Round 4: (2 sc, inc) x 6 (24)
Rounds 5-6: 24 sc (24) — Place safety eyes between rounds 3 and 4, approximately 6 stitches apart.
Round 7: (2 sc, dec) x 2, 16 sc (22)
Round 8 (Front Legs): 14 sc, Bobble stitch, 3 sc, Bobble stitch, 3 sc (22)
Round 9: (1 sc, inc) x 5, 12 sc (27)
Round 10: 27 sc (27)
Round 11: (2 sc, inc) x 5, 12 sc (32)
Rounds 12-13: 32 sc (32)
Round 14: (2 sc, dec) x 5, 12 sc (27)
Round 15 (Back Legs): 19 sc, Bobble stitch, 6 sc, Bobble stitch (27)
Round 16 (Tail Placement): 1 sc, (1 sc, dec) x 3, Tail (see instructions below), (1 sc, dec) x 2, 12 sc (Approx 24)
How to Crochet the Tail
During Round 16, when you reach the “Tail” instruction: Chain 10. Starting from the second chain from the hook, work 9 sc back down the chain. Sl st back into the main body stitch to secure, then continue with the rest of Round 16.
Round 17: 24 sc (24) — Note: If you end up with 22 or 23 stitches here, don’t worry! Simply continue; the slight difference won’t be visible once stuffed.
Round 18: (2 sc, dec) x 6 (18)
Round 19: (1 sc, dec) x 6 (12) — Stuff the body firmly.
Round 20: 6 dec (6)
Fasten off and sew the remaining hole closed.
Ear Options
You can choose between two styles of ears. Attach or work them onto the head about 2 rows above the eyes, spaced 2-3 stitches apart.
Option 1: Simple Triangle Ears
In one stitch: Ch 2, 1 dc, 1 tr, 1 dc, ch 3, and sl st into the same stitch.
Option 2: Shaped Ears
Join yarn to the head:
Stitch 1: 1 sc
Stitch 2: 1 hdc, 1 tr, 1 hdc, ch 1
Stitch 3: 1 sc, sl st.
Finishing Touches
Using black embroidery thread or a thinner yarn, stitch a small “T” shape between the eyes to create the nose and mouth. You can also add straight lines on the sides of the face for whiskers.
Pro Tips for Variation:
- Longer Muzzle: Repeat Round 2 of the pattern to give the cat a more prominent snout.
- Alternative Legs: If you prefer sewing parts, you can make legs separately (6 sc in MR, 6 inc, then 2 rounds of 12 sc) and sew them onto the belly.
- Custom Colors: Try variegated yarn for a calico look or grey yarn for a classic tabby!
Enjoy your new handmade plush companion!
“`