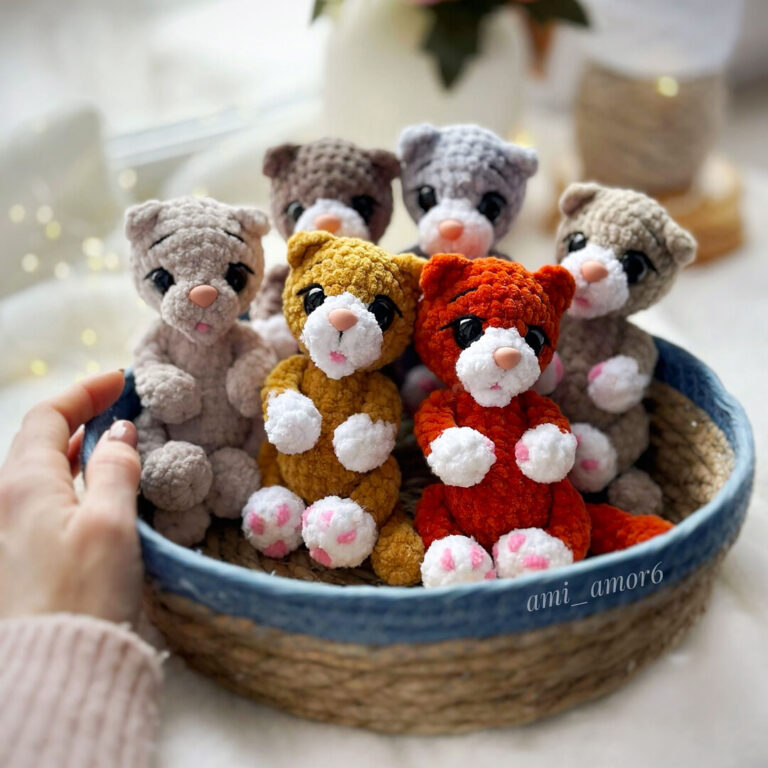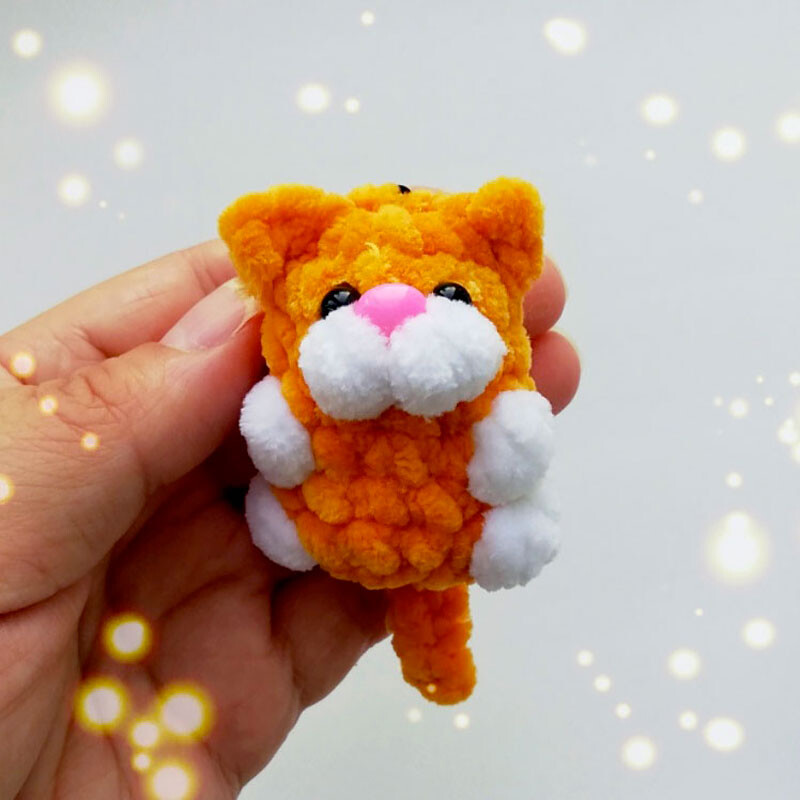
How to Crochet the Ultimate Pocket-Sized Plush Orange Cat (Easy DIY Amigurumi!)
“`html
How to Crochet a Tiny Plush Orange Cat: A Step-by-Step Amigurumi Guide
Are you looking for a quick, adorable, and super soft project to add to your crochet collection? This tiny plush orange cat is the perfect project! Whether you are looking to make a keychain, a desk buddy, or a small gift for a friend, this amigurumi pattern is beginner-friendly and uses cozy plush yarn to create an irresistibly soft texture.
In this tutorial, we will walk you through everything you need, from materials to the final stitch. Let’s dive into the world of tiny crochet creatures!
Materials Needed
To achieve that signature “squishy” look, we recommend using velvet or chenille-style plush yarn. Here is your shopping list:
- Plush Yarn: Weight approximately 120m per 100g.
- Crochet Hook: 3.5 mm.
- Stuffing: Fiberfill or polyester stuffing.
- Safety Eyes: 6 mm half-bead style eyes.
- Nose: 7 mm nose component.
Crochet Abbreviations
This pattern uses standard US crochet terms. Please ensure you are familiar with these before starting:
- MR: Magic Ring
- sc: Single crochet
- inc: Increase (2 sc in one stitch)
- dec: Decrease (sc 2 together)
- ch: Chain
- sl st: Slip stitch
- hdc: Half double crochet
- Bobble Stitch: A fluffy stitch made of 3 hdc worked into the same stitch.
The Pattern: Step-by-Step
Part 1: The Head
We begin by crocheting the head. Note that color changes are required in certain rounds to create the facial details.
- Round 1: 6 sc in a Magic Ring (6)
- Round 2: 6 inc (12)
- Round 3: 12 sc (12)
- Round 4: 5 sc in main color, change to secondary color and work 2 hdc, then return to main color and work 5 sc (12)
- Round 5: 12 sc in main color (12)
- Round 6: 4 sc in main color, change to secondary color and work 1 bobble stitch, return to main color for 3 sc, change to secondary color and work 1 bobble stitch, return to main color for 3 sc (12)
- Round 7: 12 sc in main color (12)
- Round 8: 4 sc in main color, change to secondary color and work 1 bobble stitch, return to main color for 4 sc, change to secondary color and work 1 bobble stitch, return to main color for 2 sc (12)
Note: At this stage, stuff the head firmly with fiberfill.
- Round 9: 6 dec (6)
Fasten off, pull the tail to close the hole, and weave the ends into the body to hide them.
Part 2: The Ears (Make 2)
Follow these steps to create two small, pointy ears:
- Join the yarn at the desired spot on the head.
- Work 1 hdc, 1 ch, and 1 sl st into the same stitch.
- In that same stitch, work another 1 hdc and finish with 1 sl st.
Part 3: The Tail
A small tail adds the perfect finishing touch to your kitty:
- Start with 1 sc.
- Chain 6.
- From the 2nd chain from the hook, work 5 sc.
- Finish by working a sl st into the base of the tail to secure it.
Finishing Touches
Once the head, ears, and tail are assembled, attach your 6 mm safety eyes and the 7 mm nose. Your tiny, plush orange cat is now ready to go! These make wonderful handmade gifts or adorable charms for bags.
Happy Crocheting!
“`