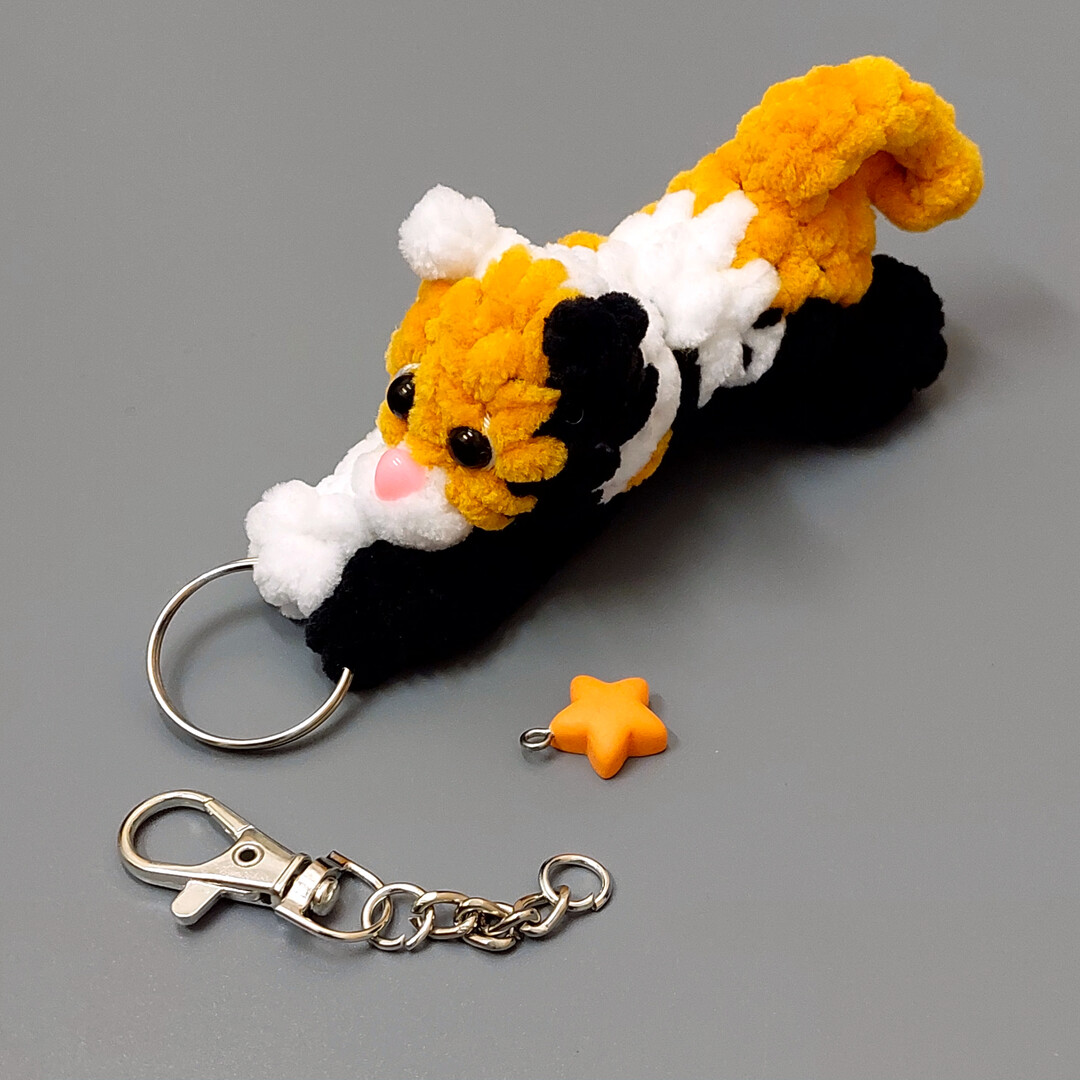
Make This Adorable “Flying Tiger” Keychain: Free No-Sew Plush Crochet Pattern
“`html
DIY Crochet Tiger Keychain: Free Plush Amigurumi Pattern
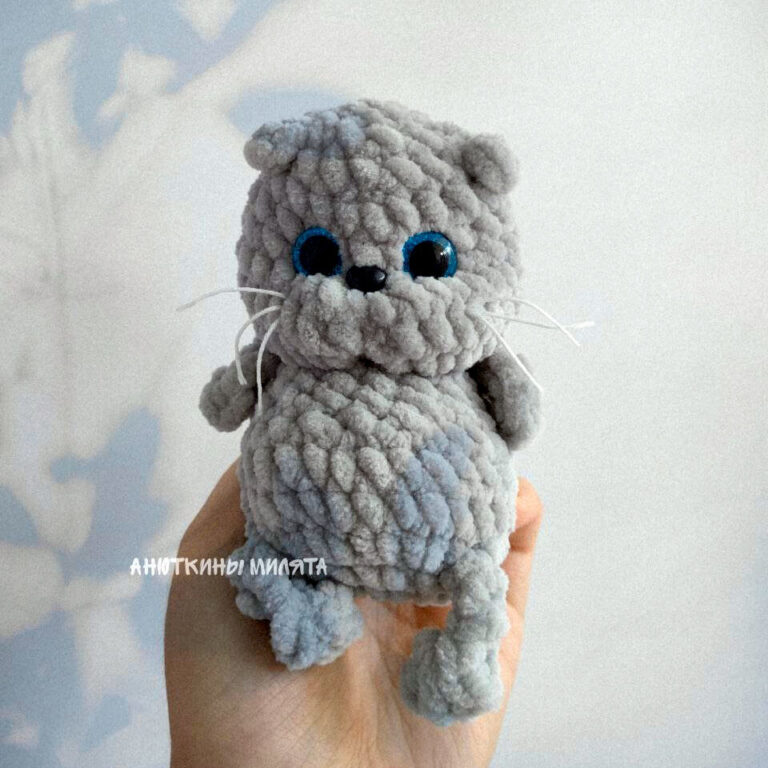
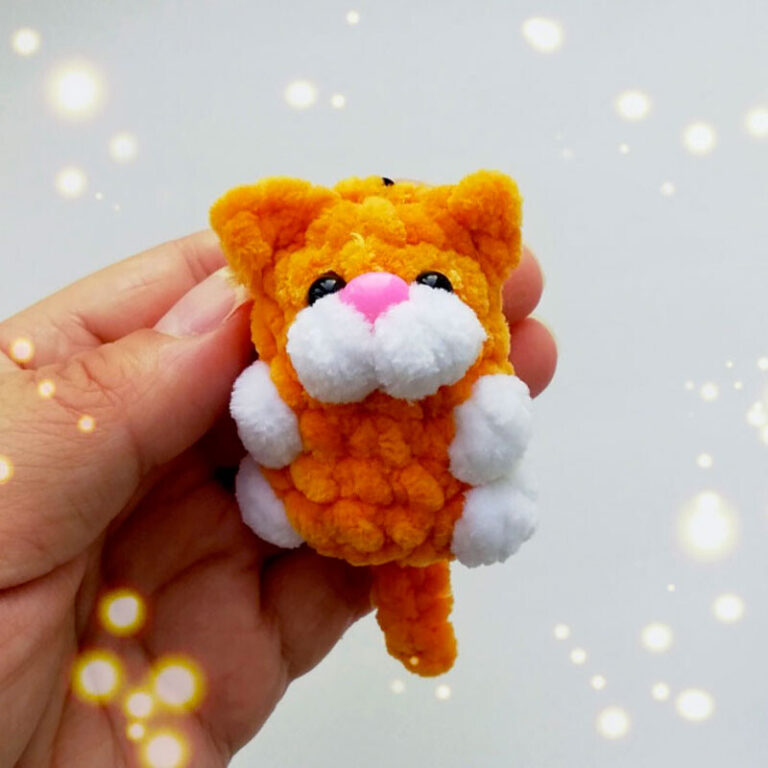
Looking for a quick and adorable crochet project? This “Flying Tiger” keychain is the perfect way to use up your scrap plush yarn. This amigurumi is worked in one piece from the bottom up, meaning there is very little sewing involved. The legs, tail, and ears are all crocheted directly into the body as you go!
Whether you want to make a tiger, a calico cat, or a leopard, this versatile pattern is a great weekend project for intermediate crocheters or ambitious beginners.
Materials You’ll Need
- Yarn: Plush/Chenille yarn (Weight 5 or 6, approximately 120m/100g). You can use orange, black, and white for a tiger or calico look.
- Hook Size: 3.75 mm (F) crochet hook.
- Safety Eyes: 6 mm half-beads or safety eyes.
- Safety Nose: 6×8 mm plastic nose.
- Stuffing: Polyester fiberfill.
- Extras: Keychain ring, tapestry needle, stitch marker, and a small amount of white embroidery thread for the eyes.
Crochet Abbreviations (US Terms)
- MR: Magic Ring
- Ch: Chain
- Sc: Single Crochet
- Inc: Increase (2 sc in one stitch)
- Dec: Decrease (sc 2 together)
- Hdc: Half Double Crochet
- Sl St: Slip Stitch
- (N): Stitch count at the end of the round
Step-by-Step Pattern Instructions
Note: This toy is worked in a continuous spiral. Do not join rounds unless specified. Stuff the body firmly as you progress.
Body and Limbs
Round 1: Start with 6 sc in a Magic Ring (6).
Round 2: (Sc, inc) x 3. At the end of the round, create the Tail: Ch 7, starting from the 2nd ch from hook, work 1 hdc, then 5 sc along the chain. Sl st back into the base stitch of the body (9).
Round 3: 4 sc, create first Hind Leg (Ch 5, starting from 2nd ch from hook, work 2 hdc in the first loop, then 3 sc along the chain, sl st back into the base stitch), 2 sc, create second Hind Leg (repeat leg instructions), 3 sc (9).
Rounds 4-6: Sc in each stitch around (9).
Round 7: 5 sc, create first Front Leg (Ch 7, starting from 2nd ch from hook, work 2 hdc in the first loop—tip: you can crochet this stitch directly around your keychain ring to secure it—then 5 sc along the chain, sl st back into base), 2 sc, create second Front Leg (repeat leg instructions), 2 sc (9).
Round 8: (Inc) x 3, 2 sc, dec, 2 sc (11).
Round 9: 2 sc, create first Ear (Ch 2, sl st in the 2nd ch from hook, sl st into the base stitch), inc, sc, create second Ear (repeat ear instructions), 7 sc (12).
Round 10: 2 sc, dec, 5 sc, dec, sc (10).
Round 11: (Dec) x 4. Create the Muzzle: In the next stitch (optionally using white yarn), work a cluster of 3 hdc with one shared top. Finish with a final decrease that transitions into the closing of the piece (5).
Finishing Touches
Before closing the final hole, ensure the toy is fully stuffed.
1. Facial Details
Glue or secure the 6mm eyes and the 6x8mm nose onto the face. Using a needle and white embroidery thread, stitch a small “sparkle” or white highlight on the outer edge of each eye to give the tiger more expression.
2. Face Sculpting (Optional)
For a more professional look, you can perform a simple “eye indentation.” Thread your needle with the body color yarn, insert it at the base of the head, come out near one eye, go across to the other, and pull slightly to sink the eyes deeper into the plush. This makes the muzzle pop out more.
3. Assembly
If you didn’t crochet the front leg directly onto the ring in Round 7, use a jump ring or your tapestry needle to attach the keychain hardware to the front paw. You can also use a small drop of glue to press the legs closer to the body if you prefer a “clinging” look.
Your adorable plush tiger keychain is now finished! These make wonderful gifts for friends or cute bag charms for your backpack.
“`